CCIE Voice Lab 1.2 Tasks
1. Activate all appropriate and necessary Network and Feature Services.
2. Ensure that the call processing cluster does not need to rely on DNS for any services.
3. Ensure that the interdigit timeout does not exceed 5 seconds.
4. Quickly provision the phones in New York and Los Angeles.
CCIE Voice Lab 1.2 Solutions
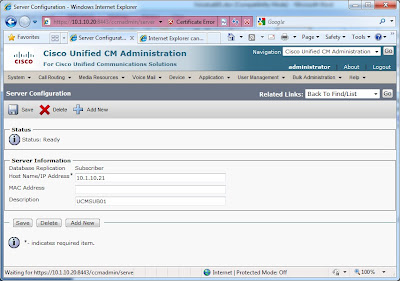
1. First step is to log into the publisher, UCMPUB01. From there, navigate to System > Servers. If your servers are listed by their hostname, click each one and change to their IP Address.

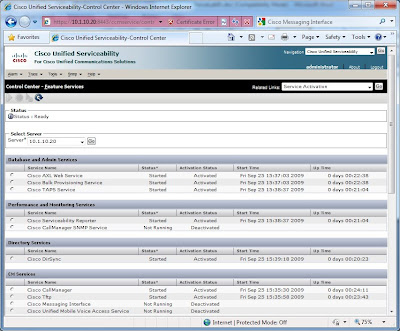
2. Next stop, visit the Cisco Unified Serviceability interface. From there, Tools > Control Center – Network Services and verify everything in functioning correctly.
3. Next, the Tools > Control Center – Feature Services in the Cisco Unified Serviceability interface shows that by default, these services are deactivated. By going to Tools > Service Activation, we can select each server and then activate accordingly. To understand which service to activate, go to the Help > This Page and review the information in Table 11-1.
After activating the appropriate services for the Publisher and Subscriber, you can verify status by navigating to Tools > Control Center – Feature Services in the Cisco Unified Serviceability.
After activating the appropriate services for the Publisher and Subscriber, you can verify status by navigating to Tools > Control Center – Feature Services in the Cisco Unified Serviceability.

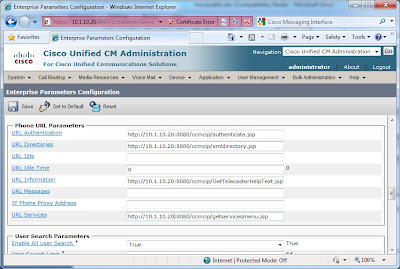
4. Returning to Cisco Unified CM Administration, go to System > Enterprise Parameters. Modify the Phone URL Parameters that reference UCMPUB01 to 10.1.10.20.

5. To modify the interdigit timeout, go to System > Service Parameters. Select the Publisher (10.1.10.20) in the Server drop down, followed by Cisco CallManager (Active) in the Service drop down. Look for the T302 Timer, and modify from the default 15000ms to 5000ms.
6. The easiest way to quickly provision phones is to enable auto registration. To accomplish this task, navigate to System > Cisco Unified CM and select the Publisher server. Use a phantom number range, such as 7000 to 7099, and uncheck the “Auto-registration Disabled on this Cisco Unified Communications Manager” box.


No comments:
Post a Comment